
Painted Glass

Let me introduce you to...

Painted Glass


Hi everyone! I hope you're enjoying this beautiful weather and looking forward to the long weekend! I'm headed to the Northwoods to spend some time with my dad this weekend. Hopefully the weather holds out and I can spend some time outdoors, relaxing!

Before I go, I wanted to tell you about a new set from the 2018-19 Catalogue that comes out on June 1st!

I got this stamp set and the matching DSP during OnStage because it was one of the sets we used during the event, and I got to take it home with me. I will admit, this is not one I would have chosen to purchase on my own, but since I got it for free I figured I'd give it a try. I was worried that the cards would just look heavy. When I think stained glass and gothic print, I think of the big cathedrals and basilicas I visited in Rome. Not really my style... HOWEVER... I pushed myself to think of this set in a different light, and I ABSOLUTELY ADORE the cards I created! I've had them on display on the shelf above my desk for inspiration the last few days. I just love how light and refreshing these cards look, and what's great is that the DSP did all of the hard work for me. It really steals the show!

This was the first card I made with this set. 


I used Pool Party and Whisper White cardstock. On the Whisper White,  I gave some texture to the card by using the Lovely Floral Dynamic Textured Impressions Embossing Folder from the Share What You Love suite. Then I cut out an image from the Graceful Glass Designer Vellum and simply colored it using my Stampin' Write Markers. I stamped a sentiment from the set onto Whisper White, added some silver thread and a pearlized doily and called it a day! Simple, yet absolutely stunning!

My second card stepped it up a notch. 


I used the new color, Soft Sea Foam, as the base of this card. I used circle framelits to cut circles into each layer of the card. I used embossing paste to texturize the front of the card, and I colored the vellum. Then I used a sentiment and a framelit from the Petal Palette Bundle to top it off. And the best part is when you hold this card up to the light!


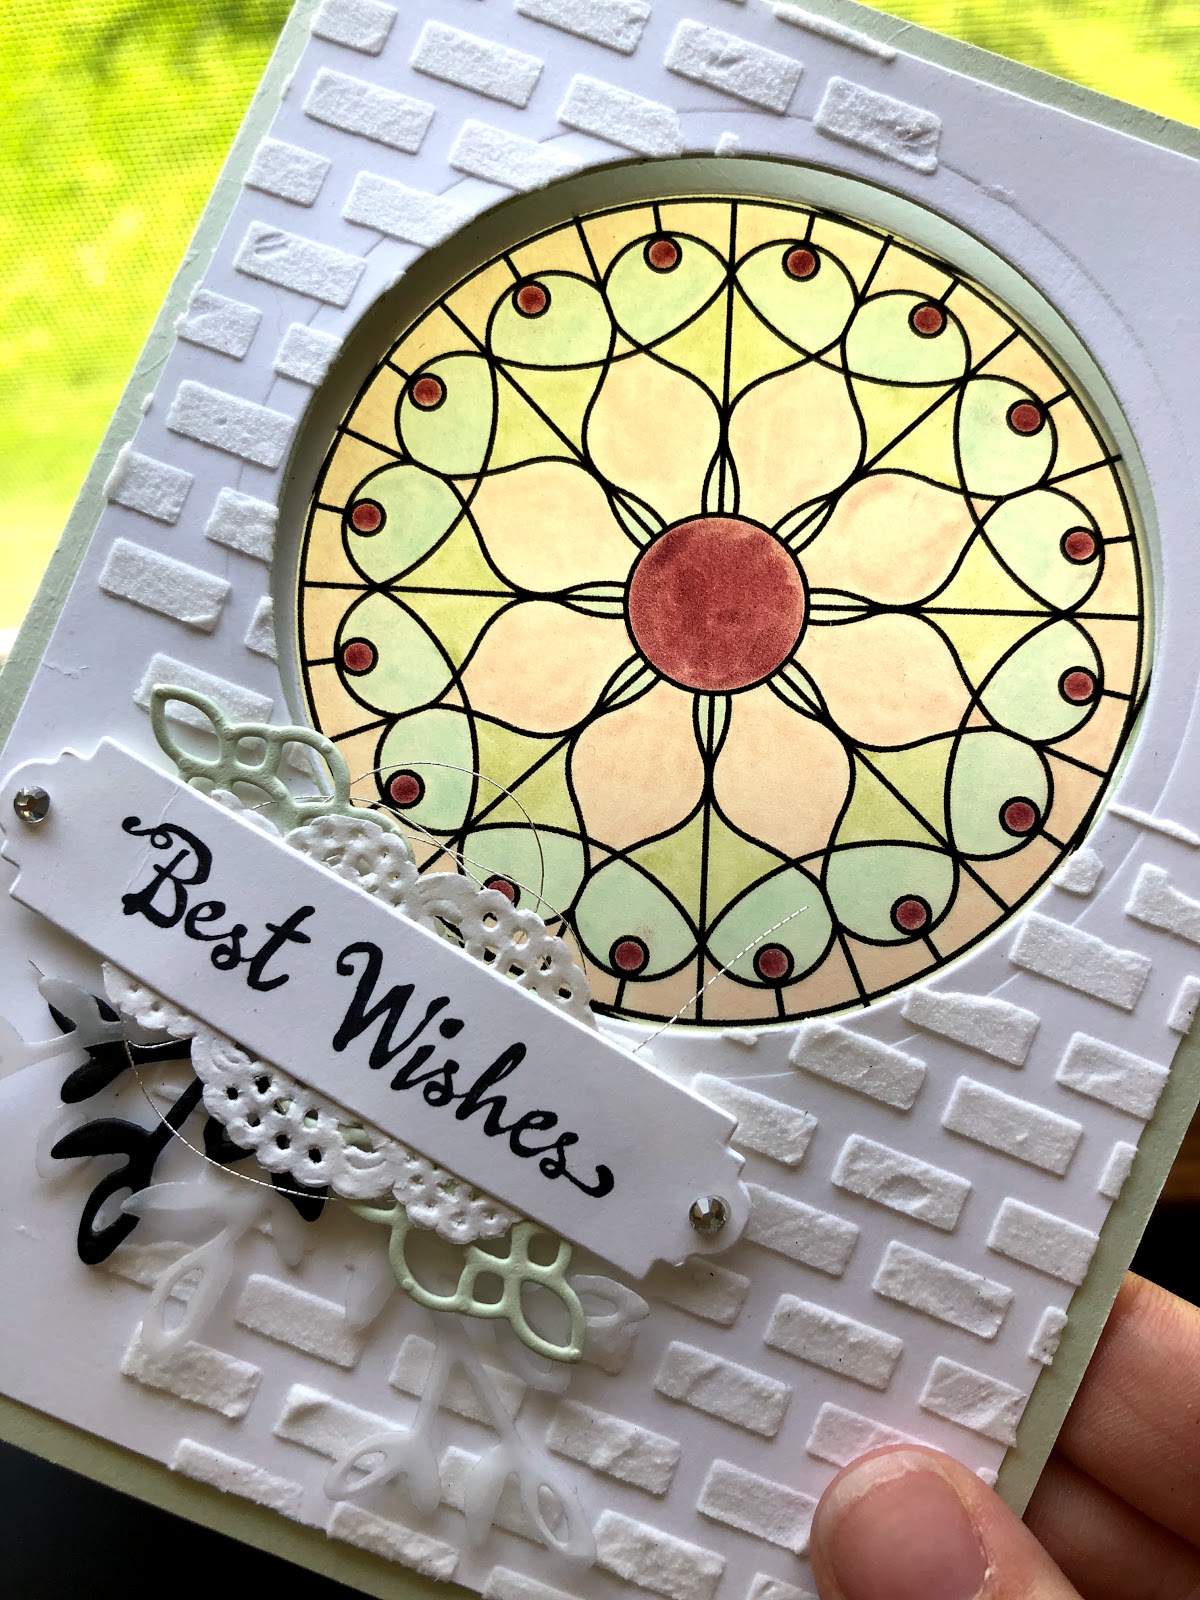
I purposefully designed the card so it LOOKED like actual stained glass when held up to the light. The vellum is glued in between the back of the card and a white piece on the inside so there is nothing behind it to block the light. This truly brings the card to life.

Needless to say, I am now in love with this set! I'm sure I will be sharing more creations using this suite in the future. Enjoy your long weekend, everyone! Happy crafting!

Comments

Popular posts from this blog

Enjoy Life

Today I'm going to tell you about the new set Enjoy Life. I first heard about this set at OnStage Milwaukee, and I fell in love with the set and the story behind it immediately. The person who designed this set is from my home state, Wisconsin. At OnStage, she shared the story behind this set and how it came to be. It resonated with me, and I realized that stamping has always been more than just paper and glue. It creates connections between people. It is therapy. It commemorates good times and bad. This set was designed by Connie Fitzgerald and represents both of her incredible children. Through her speech, I could feel her passion towards creativity and her love for not just stamping but for people and for life. She is truly inspirational, and I hope I give Enjoy Life the justice it deserves. Here is what I created using Enjoy Life. I used Crumb Cake cardstock as the base and added a layer of the new color Mossy Meadow. Then I stamped the images from the set onto ...

First Frost Ornaments

I have one more project to show you all using the First Frost Bundle and the Labeler Alphabet stamp set. I am so excited to tell you all about this project! Last year before Christmas, I was searching on Pinterest and came across some cute ornaments that I knew I could recreate with the help of my boyfriend, Joe, who is a woodworker. He helped me make them, and I stamped words on them using my Labeler Alphabet set. When I was decorating my tree this year, I found them and fell in love with them all over again. A few days before I decorated my tree, Joe was asking me what I think he should make as gifts for people for Christmas, and when I remembered I had these ornaments, I said we should make some more sets of them. So, we made a bunch of sets of our ornaments to give to family and friends for the holidays. After we made them, I was thinking about how we would package them to give as gifts. I saw some cute Christmas boxes and tins at Hobby Lobby, but Joe reminded me that the point...

First Frost

Hi everyone! Long time, no see. I had such a busy semester that I have not been keeping up with my blog like I've wanted to. That doesn't mean I haven't been busy stamping! Now that I'm done with school for about a month, my goal is to catch up on sharing everything I've been up to! Christmas is just around the corner, and I wanted to take some time to share a few of my favorite projects with you all. The First Frost Clear-Mount Bundle from the Frosted Floral Suite was something that caught my eye immediately when I first looked through the Holiday Catalog. And sure enough... almost all of my projects that I have done for Christmas have used this bundle! I will share a few of them here. Here are four cards I created with this bundle. What I love about the products in this suite is that you have the freedom to create more than just Christmas cards. The first picture was the card I sent out to friends and family for the Holidays, but it could really be used for ...